The Role Of The Contract Manufacturer Under The EU MDR & IVDR

By Mark Durivage, Quality Systems Compliance LLC

https://www.meddeviceonline.com/doc/the-role-of-the-contract-manufacturer-under-the-eu-mdr-and-ivdr-0001

Regulation (EU) 2017/745 Medical Device (EU MDR) of the European Parliament and of the Council of 5 April 2017 on medical devices, amending Directive 2001/83/EC, Regulation (EC) No 178/2002, and Regulation (EC) No 1223/2009 and repealing Council Directives 90/385/EEC Active Implantable Medical Devices Directive (EU AIMDD) and 93/42/EEC Medical Device Directive (EU MDD) was set for enforcement in May 2020. However, due to the global COVID-19 pandemic, the European Commission extended the date of application for EU MDR by 12 months, meaning medical device companies now have until May 26, 2021 to comply with MDR requirements.

Chapter 1, Scope and Definitions, Article 2, Definitions, of the MDR provides the following:

Manufacturer – means a natural or legal person who manufactures or fully refurbishes a device or has a device designed, manufactured, or fully refurbished, and markets that device under its name or trademark.

Economic operator – means a manufacturer, an authorized representative, an importer, a distributor, or the person referred to in Article 22, Systems and Procedure Packs, requirements (1) and (3).

Other than under the definition of “economic operator” in Article 22, Systems and Procedure Packs, requirements for sterilizers, the MDR does not directly address the definition and requirements of the role of the traditional contract manufacturer.

Regulation (EU) 2017/746 In Vitro Diagnostic Medical Devices (IVDR) of the European Parliament and of the Council of 5 April 2017 on in vitro diagnostic medical devices and repealing Directive 98/79/EC and Commission Decision 2010/227/EU In Vitro Diagnostic Medical Devices Directive (IVDD) is set for enforcement on May 26, 2022.

Chapter 1 Scope and Definitions, Article 2 Definitions of the IVDR provides the following:

Manufacturer – means a natural or legal person who manufactures or fully refurbishes a device or has a device designed, manufactured, or fully refurbished, and markets that device under its name or trademark.

Economic operator – means a manufacturer, an authorized representative, an importer, or a distributor.

The MDR and IVDR do not directly define or address the role of the traditional contract manufacturer, which is traditionally defined as those that manufacture products for or on behalf of the specification holder.

Before placing a medical device or in vitro diagnostic medical device on the market, manufacturers are required to obtain a single registration number (SRN) and register and input the required information into the required electronic system. There is no requirement for contract manufacturers to obtain an SRN and register, except for those that combine medical devices or in vitro diagnostic medical devices into systems or procedure packs or that sterilize systems or procedure packs.

The most significant requirement for manufacturers (specification holders) is to ensure there are robust quality agreements executed with the contract manufacturers. Some of the items to consider including in the quality agreement are:

  • Quality management system
  • Unannounced audits
  • Availability of records
  • Risk management
  • Validations
  • Change control
  • Traceability
  • Post-market surveillance support

Although not explicitly required, a functioning quality management system (QMS) should be a primary consideration. Without a QMS (ISO 9001 or 13485), fulfilling the remaining requirements will be difficult, if not impossible, and may hinder the product approval process for manufacturers (specification holders). An effective certified QMS from a reputable registrar should provide the necessary structure required for compliance.

The contract manufacturer should be aware of the possibility of unannounced audits of suppliers and/or subcontractors by notified bodies. Some contract manufacturers, especially smaller organizations, may not be prepared to handle such an audit. In this case, the manufacturer (specification holder) should help the contract manufacturer develop a process and procedures for unannounced audits by notified bodies. A good time for practice could be during a supplier audit.

The quality agreement should ensure that documents and records related to the production of a medical device or in vitro diagnostic medical device should be readily available and must be shared with the manufacturer (specification holder) and/or notified body upon request. This will include device master records (DMRs), device history records (DHRs), policies, standard operating procedures, work instructions, validations, risk management documentation, training records, etc. The documents and records must be readily available for review and stored in a way that minimizes deterioration and prevents loss.

Risk management documentation, usually a process failure modes effects analysis (pFMEA), should be developed and maintained based on the requirements of ISO 14971, Medical devices – Application of Risk Management. It is especially important that post-market surveillance data (internal nonconformances and external complaints) are used to update the assumptions for the probability of occurrence and probability of detection, as well as to identify new failure modes to demonstrate an active and effective risk management process.

Manufacturers (specification holders) need to ensure contract manufacturers establish and maintain robust risk-based qualification and validation programs, as these documents will be subject to review by notified bodies. Adequate sample size linked to risk is essential to ensure validations demonstrate confidence that the process will produce consistent results that meet predetermined specifications.

Change control processes used by contract manufacturers must ensure there is, at a minimum, a communication and feedback mechanism that allows the manufacturer (specification holder) an opportunity to assess all changes for potential regulatory impact on the status of the marketing authorization.  Preferably, the manufacturer should sign on to any changes affecting its regulated products. 

Traceability is essential for all raw materials and components used in the manufacture of regulated medical devices. Manufacturing materials such as mould releases, cutting oils and fluids, and tumbling media should be recorded and subject to change control, as a regulatory assessment will be required by the manufacturer (specification holder). A robust traceability program will aid in the prevention of fraudulent and/or counterfeit raw materials and components entering the systems as well as aid in complaint investigations, field corrections, and recalls.

As part of post-market surveillance support, contract manufacturers will need to ensure that production records as well as nonconformance records are readily accessible and constructed to facilitate review. The internal failure modes of the contract manufacturer must align with the external failure modes of the manufacturer (specification holder) to allow for an efficient review of data regarding complaints and escalation to CAPA as well as the validation of FMEA probability of occurrence and detection assumptions.

Conclusion

The relationship between the contract manufacturer and the manufacturer (specification holder) under the EU MDR and IVDR will be much more participatory and engaging than with previous regulations. The EU MDR and IVDR will necessitate a partnership built on a foundation of trust, cooperation, and increased communications.

I cannot emphasize enough the importance of establishing a comprehensive quality agreement outlining the roles and responsibilities of each party as well as the increased expectations and support for unannounced audits, the availability of records, an active risk management and validation program, a robust inclusive system for change control, increased traceability requirements, and post-market surveillance support. The suggestions presented in this article can and should be utilized based on industry practice, guidance documents, and regulatory requirements.

About the Author:

Mark Allen Durivage has worked as a practitioner, educator, consultant, and author. He is Managing Principal Consultant at Quality Systems Compliance LLC, an ASQ Fellow and SRE Fellow. Durivage primarily works with companies in the FDA-regulated industries (medical devices, human tissue, animal tissue, and pharmaceuticals) focusing on quality management system implementation, integration, updates, and training. Additionally, he assists companies by providing internal and external audit support as well as FDA 483 and warning letter response and remediation services. He earned a BAS in computer-aided machining from Siena Heights University and an MS in quality management from Eastern Michigan University. He holds several certifications, including CRE, CQE, CQA, CSSBB, RAC (Global), and CTBS. He has written several books available through ASQ Quality Press, published articles in Quality Progress, and is a frequent contributor to Life Science Connect. You can reach him at mark.durivage@qscompliance.com with any questions or comments.

Care of Surgical Instruments

Surgical instruments are expensive and the cost of preventative care is minimal when compared to the cost of replacing instruments.

Below are some of the points to consider regarding surgical instruments care and maintenance.

        Generally instruments are made from stainless steel. Stainless steel contains nickel and chromium. A small percentage of the population is known to be allergic to these metals. If an allergic reaction occurs, direct patient to consult physician.

–        Before cutting/using wire, place gauze or cotton roll next to wire end to prevent scrape of wire fragments.

–        If instruments are supplied non sterile, it should be cleaned and sterilized before every use.

–        Only use the instrument for its intended purpose. Only qualified persons should use the instrument.

–         Before sending instruments back to manufacturer for maintenance, repair or any other reason, it should be cleaned and sterilized and cover the sharp edges or points with protective cap.

Handling new instruments.

New instruments and those returned from repair must be removed from their transportation packaging before storing or inclusion in the instruments usage and processing cycle.

Any protective caps or cover should be removed.

Brand new and repaired instruments must be sent through the entire processing cycle in the same manner as used instruments.

You should not skipped cleaning step because residues (ex; from packing materials or care agent) could lead to formation of stains or deposits during sterilization.

Always check cleaning results by visual inspection.

Brand new instruments and instruments returned from repair should be only stored in their original packing at room temperature in dry, clean and dark rooms. Condensate may build up inside plastic packages as a result of temperature fluctuations that might cause corrosion damage.

Microsurgical instruments should be stored in suitable racks.

Causes of Corrosion (Staining, Pitting, and Marking)

Generally, surgical instruments are manufactured from 300 and 400 series stainless steel.   While this material rarely rusts… but it does stain, despite its name. Stains appear as an orange or brown discoloration.

Corrosion resistance of stainless steel depends on the quality and thickness of the passive layer, which is a protective layer of iron/chromium oxide.

Passive layers are extremely resistant to many chemical substances. However, passive layer of brand new instruments is necessarily still thin and so these instruments tend to be more sensitive to cortical treatment conditions then are older instruments. Among few substances that can attack and destroy this layer are the halogen salt, chloride is the most powerful of them. It tends to react with the passive layer leading to “pitting corrosion” and also “stress corrosion ”. So, for that reason never immerse stainless steel instruments in  salt (Na Cl) solution.

Surgical Residues Blood, pus, and other secretions contain chloride ions that lead to corrosion, most often appearing as an orange-brown color.  If left on the instruments for any extended period of time (1-4 hours), the instrument will mark and stain, especially if these residues are allowed to dry.  Therefore, always clean and dry every instrument thoroughly after use.  Only sterilize a clean instrument.  The most damaging procedure is to allow dried-on debris to become baked-on stains in the autoclave.  The temperature of the autoclave (250°-270°) will cause chemical reactions that can make the stain permanent.

Remember, an autoclave does not clean; it will only sterilize.

–        Even tap water can stain an instrument.  Tap water contains a high concentration of minerals that can be seen as a fine deposit on the instrument surface.   Rinsing with distilled water eliminates such deposits.  Water with high mineral counts left to sit on an instrument can cause unattractive stains.   Therefore, it is important to dry your instruments immediately and thoroughly

Cleansers: The cleansers and cleaning agents you use could also be a cause of corrosion.  Strong substances, as well as those containing a chemical make-up of acid or alkaline-based solutions can lead to pitting and staining. Wash instruments with a neutral pH soap (between 7pH – 8pH) for optimal results.  Anything higher may damage the instrument and is not necessary.

Do not use Alkaline Solution, dish soap, laundry soap, or surgeons hand scrub.  These products will cause spotting and corrosion.

Using an instrument cleaning brush is a good idea, especially for jaw serrations, teeth, and hinged areas.

Cleaning After Surgery: The washing process should begin within 60 minutes after surgery, even if sterilization will take place much later.  Washing instruments within a few minutes of surgery is your best defense against corrosion, pitting, and staining. However, it should not exceed 4 hours. Use only approved solutions.  Non-approved solutions are any that do not specifically state on the label that uses include surgical instruments, stainless steel, and sterilization. Approved solutions are specially designed for surgical instruments and the sterilization cycle.

Instruments incorporating cavities  such as cannulas or tube shafts are always difficult to process; so special care and attention should be directed to its cleaning steps. Also they should be checked for obstructions. Obstructed instruments should be processed and in case it does not help, such instruments should be discarded.

Dental materials adhering to dental instruments (such as filling materials or cement remover) must be cleaned a way immediately after each use, otherwise the material will be harden on the instrument and cause corrosion.
It is highly recommended to inspect different instruments after cleaning and before further processing. Instruments with hairline cracks in the joint area as well as those are damaged must be replaced, as there functionality can no longer be fully guaranteed.

Moreover instruments function test is essential as those do not perform their function must be discarded as well. Generally, if the instrument has oxide layer, spots, cracks, scratches, pit, hole worn out blades, inefficient cutting, dull surface and rust then do not put the instrument into services.

Instruments with coagulation residue that cannot be removed even by intensive cleaning (with brushes or ultrasonic) must be discarded, as their function and required hygienic condition cannot be guaranteed.

Ultrasonic cleaning: A method of cleaning that is growing in popularity is ultrasonic cleaning.  This method is, by far, the most efficient and effective available today.  Its ease of use and superior efficiency is quickly making ultrasonic cleaning the preferred choice for today’s surgeons. In fact, ultrasonic cleaning is 16 times more efficient than hand cleaning.  Place instruments in the ultrasonic unit for 10-15 minutes and use a neutral pH solution.

Before placing into the ultrasonic unit, clean instruments of all visible debris by washing them in an approved instrument cleaning solution.

Don’t mix dissimilar metals (such as aluminium and stainless) in the same cycle. Because it can result in electrolysis process and can cause corrosion of the instrument. Make sure instruments have plenty of room.  Don’t overload your ultrasonic cleaner. As with all types of cleaning, open all instruments so ratchets and box locks are fully exposed to the cleaning process.

Upon completion of the cycle, remove instruments immediately, and rinse them. Dry thoroughly with a towel, ensuring that no moisture is left on the instruments. The use of water in an ultrasonic cleaner is not recommended.  A neutral pH ultrasonic cleaner solution, when properly mixed, effectively reduces the surface tension of the solution and increases the ultrasonic cavitations process. The solution should be changed at least daily, or sooner if the solution appears dirty or murky.

 Lubrication :

One of the easiest, yet most effective ways to keep instruments in excellent condition is to lubricate them after every cleaning.  Proper lubrication keeps instruments from rubbing and scraping, thus preventing dulling and strain to joints and hinges.  Moving parts on instruments, such as joints, box locks, ratchets, screw joints and friction surfaces, should be lubricated regularly.  Before auto claving, lubricate all instruments that have moving parts.  Only use surgical lubricants because they are steam-penetrable. Surgical instruments care agents is mainly Paraffin/white oil based, bio compatible in accordance with international pharmacopoeia.

Wrapping Materials, Surgical Towels, and Drapes

Wrapping of surgical instruments is essential in the sterilization process.  If your practice uses reusable towels and drapes, please be certain to use as little laundry detergent as possible. 

Towels and drapes can retain soap particles.  During the autoclave cycle, steam passes through the fabric, picking up these soap particles and depositing them on the surface of the instruments. 

One suggestion for preventing this is to run an extra rinse cycle to remove excess soap particles.  Also, if your instrument packs are coming out wet, we suggest a towel be placed inside the pack to absorb moisture

Difference between  Rust and  Stain on surgical instruments.

Stains can be removed, whereas rust will leave permanent damage.

To determine if a brown or orange discoloration is a stain or rust, use the eraser test. 

Rub a pencil eraser over the discoloration.  If the discoloration is removed with the eraser and the metal underneath is smooth and clean, this is a stain.  

If a pit mark appears under the discoloration, this is corrosion or rust.

 Stain Colors

 Stain Color, Brown/Orange: Cause: A result of high-pH detergents, Chloro hexidine usage, or improper soaking of instruments.  Soaking in tap water can also cause this color stain.

Stain Color, Dark Brown: Cause: Low-pH instrument solutions.  A malfunctioning sterilizer may also cause the brownish-colour film.  Similar localized stain spots can also be a result of baked-on blood.

Stain Color: Bluish Black Cause: Reverse plating, when instruments of different metal (e.g., chrome and stainless steel) are ultrasonically processed together.  Additionally, exposure to saline, blood, or potassium chloride will cause this bluish black Color.

 Stain Color: Multi colour: Cause:  Excessive heat by a localized hot spot in the sterilizer.  The rainbow-colour stain can be removed.

Stain Colour: Light- and Dark-Colour Spots. Cause: Water droplets drying on the instruments.  With slow evaporation, the minerals sodium, calcium, and magnesium left behind can cause this spotting.

Stain Color: Bluish Gray Cause: Liquid (cold) sterilization solutions being used beyond manufacturer’s recommendations.

 Stain Color: Black Stains Cause: Contact with ammonia or a solution containing ammonia.

Stain Color: Gray Cause: A liquid rust remover being used in excess of manufacturer’s recommendations.

Rust Cause: Dried blood that has become baked on the serrated or hinged areas of surgical instruments.  This organic material, once baked on, may appear dark in color.  Also can be caused by soaking in tap water.

Sharpening:

Instruments which may require more frequent sharpening and adjusting include; Scissor, Needle holders, Bone Cutters, Hemostats, Osteotomes, Rongeurs, Chisels, Bone curettes, Knives and Punches.
Precision sharpness is an absolute prerequisite for any surgical tray.  The best strategy is a proactive approach with an established routine inspection and a regular sharpening maintenance program.

Boil Test

BOIL TEST FOR SURGICAL INSTRUMENTS

FOR TESTING CORROSION RESISTANCE

The Boil Test is performed to check presence of corrosion in surgical instruments resulting either due to some process faults or due to some material composition problem disturbing the passivation layer of the stainless steel surgical instruments.

The process is usually done at the final stages of the production.

Following is the normal procedure for Boil Test.

  1. Clean the instruments using soap and warm tap water and then rinse in distilled water.
  2. Immerse the instruments in distilled water in the beaker or better if in a sterilizing container with lid for at least 30 minutes, keeping the water boiling.
  3. Remove the instruments from the beaker and keep these in open air on the table for at least one hour.
  4. Wipe the instruments with a dry cloth and examine it visually for any evidence of corrosion.
  5. Check any blemish on the surface / crevices which were left even after rubbing for evidence of corrosion.
    • For severe test boil the instrument in the sterilizing container with lid for an hour keeping the water boiling.
    • Keep the instruments in the container for at least 12 to 15 hours.
    • Then wipe the instruments and let them dry in open air.
    • Observe the instruments for corrosion.


Surgical Instruments usage: Scissors

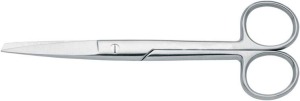
Surgical scissors are used for cutting, dissecting tissues, to cut bandages and sutures. Each surgical procedure has a special pair of scissors that is used to perform the intended task. Surgical scissors differs in value and durability from the regular scissors. They come in varieties depending on their use such as bandage scissors, dissecting scissors, iris scissors, operating scissors, stitch scissors, tenotomy scissors and plastic surgery scissors.
Material generally used for scissors is high carbon stainless steel because recommended hardness requirement is above 50HRC.
We go through the function and use of some of the scissors generally used in the medical field:


Operating Scissors:
These are used for general purposes like in surgical kits, for cutting sutures, gauze and during surgical operations.
Available in different blades style combination like sharp/sharp, sharp / blunt, blunt/blunt, straight, curved, with or without Tungsten Carbide tips etc.


TENOTOMY SCISSORS:
These scissors are used in delicate surgery where extreme control is required. Due to their shape the movement of the blade during cutting action is very smooth on  areas like lips, cheeks tissues etc.
 In some types one blade is serrated to avoid slippage of fine tissues. Also available with Tungsten carbide tips.
Blades shape are available in combination of blunt and sharp version.


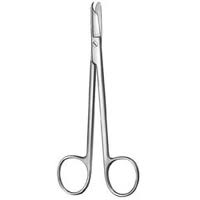
STITCH SCISSORS:
These are used to cut the sutures, specially hooked shape lower blade helps in doing the task.
Sometimes serrations are produced to avoid slippage.


IRIS SCISSORS:
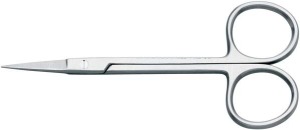
These scissors are especially designed with very fine sharp blades for performing different functions during eye surgery operations.
These are made of high carbon stainless steel.
Some of the industrial use of this type of scissors made of carbon steel includes fine cutting in embroidery.


DISSECTING SCISSORS:
Different types of dissecting scissors are available for use according to typical applications.
Metzenbaum scissors, Iris scissors, tenotomy scissors ,mayo scissors, Westcott scissors, probe scissors all are different types of dissecting scissors.


BANDAGE SCISSORS:
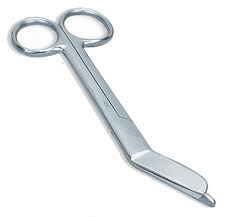
These are especially designed scissors with one blunt blade and one probe blade for the smooth movement without damaging the skin during bandage cutting.
The have serrations on lower blade to avoid slippage.

Surgical Instruments Usage- Forceps

 Different types of surgical instruments are used for number of functions such as:
  •       Clamping
  •        Grasping
  •       Holding
  •         Cutting
  •        Dissecting
  •         Dilating
  •         Suctioning etc.
Instruments must be inspected before , during, and after the surgical / examination procedure.
Main Risks associated with the surgical instruments use are:
  Infection due to improper sterilization techniques.
·        Improper use of instrument by operator.
·        Leaving an instrument inside patient’s body.
·        Use of defective instrument.
Now we go through the introduction and usage of some of the most commonly used surgical instruments

Forceps:

Originated from the Latin word “Forca” meaning to trap, grip something.
In medical field, forceps are used for grasping tissues, blood vessels, holding organs. These are commonly made from Stainless Steel (Martensitic)
Normal they are either with locks (ratchet) such as Kelly forceps, mosquito forceps, Crile forceps or without locks (ratchets) such as Thumb dressings forceps.
Some of the different types of forceps used in the medical field include:


Dressing Forceps:
These forceps are normally used during dressing of wounds and removal of dressings.
These are manufactured with straight, curved and with special angled tips for various tasks during operations.
Very fine delicate dressing forceps are used in eye surgery.
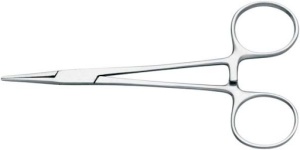
Hemostats Forceps:
Such forceps are used to prevent the flow of blood from operating area (blood vessels) during surgery i.e. for controlling hemorrhage, for grabbing and holding.
All of the hemostats forceps are with locking mechanism called ratchets to control the grasping action of the instrument.
Some of the types include Crile, Kelly, Mosquito, mixter, splinter etc.
Splinter Forceps:
Such forceps are used for special purposes like removing sharp pointed pieces of bones (splinter) from flesh, to handle sutures, and to manipulate very narrow areas due to their fine tip and triangular shape.
These are manufactured with smooth and serrated tips, curved, straight with or without ratchets.
Different types of splinter forceps includes carmalt, Hunter, Stieglitz etc.
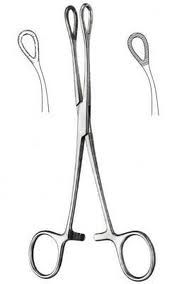
Sponge Forceps:
Due to their holding shapes these are commonly used for clamping, holding, gripping, twisting tissues, inserting any external things into the body such as IUD.
Spongeforceps are extensively used in gynecological procedures like during abortion, sterilization, examinations and for handling sponges, gauzes, wipes etc.
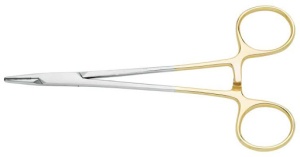
Needle Holders:
These are mainly used to hold needles during suturing procedure.
These are available with normal tips and with tungsten carbide tips ( for more hard and firm needle grip with gold plated rings for identification from normal ones).
Usually these are with ratchets (automatic lock) to hold the needle during suturing..
Obstetric Forceps:
 These forceps are used to assist in the child delivery procedure. They are designed to smoothly hold and pull the baby head during vaginal delivery.
Tissue Forceps:
They differ with the dressing forceps due to their teeth in jaws. These teeth provides better grip to hold Tissues. The teeth are designed to avoid the damage to the tissues .
The types depend on shape of the forceps and number of teeth on both sides like adson tissue forceps 1×2 teeth, Adson brown tissue forceps 9×9 teeth, Allis tissue forceps (hinged ring-ratchet type).
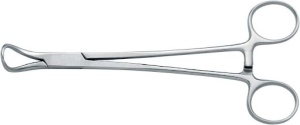
Tubing Forceps (clamp):
These are used to introduce tubes in to small blood vessel during operation hence also know as tubing introducer.
  Towel Forceps:
These are used to hold/place pieces of towel/drapes at correct position in the operating area. They are very important surgical instruments tool and helps in recovering towels pieces after the operation.

How surgical instruments are sterilized

STERILIZATION

Prior to operating surgical instruments are sent for sterilization which is a process / combination of processes in which the instruments are cleaned from all microorganisms like bacteria, viruses, fungi, etc.
Sterilization must not be confused with disinfection and sanitization because sterilization destroys all life where as the last two processes only selectively terminates the microorganisms.

Surgical instruments can be sterilized in several different ways. The three main methods used are:
    
  • ETHYLENE OXIDE GAS STERILIZATION
  • STEAM STERILIZATION
  • RADIATION STERILIZATION

ETO gas sterilization:

In this process instruments are packed and placed in a vacuum chamber and Ethylene gas is then passed which destroys all the living organisms on the instrument. Ethylene oxide penetrates well, moving through paper, cloth, and some plastic films and is highly effective.
 Ethylene oxide sterilizers are used to process sensitive instruments which cannot be adequately sterilized by other methods. ETO can kill all known viruses, bacteria and fungi, including bacterial spores and is satisfactory for most medical materials, even with repeated use. However it is highly flammable, and requires a longer time to sterilize than any heat sterilizing treatment.

Steam sterilization:

Steam sterilization is also known as autoclaving. The instruments are placed (packed in layers of cloth) in pressure vessel and are exposed to saturated steam at 121°C for a minimum of 20 minutes. The elevated temperature and pressure destroys the cells of any living organism within the vessel.
Proper autoclave treatment will inactivate all fungi , bacteria, viruses and also bacterial spores , which can be quite resistant. It will not necessarily eliminate all prions .

Radiation sterilization:

Different radiations such as electron beam , X rays , gamma rays , or subatomic particles are used for the purpose. Radiation sterilization uses ionizing radiation to sterilize medical instruments. The radiation oxidizes any biological matter it comes into contact with, destroying its DNA, thereby sterilizing the instruments. This process is considered to be highly effective.

Other methods

Other heat methods include flaming, incineration , boiling, tyndalization, and  dry heat.

Flaming is usually used for the laboratory equipment not much for the surgical instruments.

Incineration   is done to burn the bio bastes from the Hospitals before mixing this to the nonhazardous wastes.

Boiling in water for fifteen minutes will kill most vegetative bacteria and inactivate viruses, but boiling is ineffective against prions and many bacterial and fungal spores; therefore boiling is unsuitable for sterilization. Boiling is a simple process, and is an option available to most people, requiring only water, enough heat, and a container that can withstand the heat; however, boiling can be hazardous and cumbersome.

Tyndalization  This is an up gradation of boiling process and involves boiling for a period (typically 20 minutes) at atmospheric pressure, cooling, incubating for a day,
  •  again boiling, cooling, incubating for a day,
  •  again boiling, cooling, incubating for a day,
  •  and finally boiling again.
This is effective because many spores are stimulated to grow by the heat shock.  Tyndalization is ineffective against prions.

Dry heat is done in ovens up to a temp of 170 c for a period of 2 hrs. This process is mainly used for glass and metal objects i.e. cannot be used for plastic and rubber items.
  • After sterilization all the instruments must be placed in an area free of dust, dirt, moisture etc.  as all these factors can affect the sterility.
  • The shelf life of a sterilized item is also a very important factor to be considered. Any things such as  a tear in the wrapping , time elapsing, wetting  could allow the microorganisms to effect the sterilization.

How surgical instruments are made..?

How  surgical Instruments are made……?

Surgical instruments manufacturing is based mainly on Hand skill work. The master craftsmen spend their lives to learn the art and then produce world class instruments.

Material

First stage is the selection of material for a particular item keeping in view the required specifications. As discussed in my first post majority of the surgical instruments are manufactured from different Stainless steel grades. These grades for particular range of instruments can be found in standards like ISO 7153/1, BS 5194-4, AISI (F899).

Stainless Steel Grades

Few examples of the grades used are:
Magnetic Stainless Steels
AISI 410 /410X: Used for Gripping Instruments like Forceps, Tweezers, Dressing forceps, retractors etc.
AISI 420A : Used for Cutting instruments like Bone Rongeurs, Chisels, Gouges, scissors with carbide inserts and Needle Holders etc.
AISI 420B: Used for High grade cutting instruments like Scissors, Bone Rongeurs etc.
Non Magnetic Stainless Steel
AISI 304: Used for Cannula, Clamps, Holders, Spreaders, suction tubes etc.
Appropriate selection of the material helps in achieving the intended output of the manufacturing processes and the final required specifications.

Manufacturing Stages:

Generally following are the manufacturing stages:

Forging: This is a simply a process for shaping metal parts through compressive forces either Hot or in Cold state. There are two types of forging processes involved in surgical instruments manufacturing i.e. Hand forging for small quantities orders and Hammer Forgings for bulk quantities.

Press work: After getting a crude shape impression in a piece of metal the excess material around that shape is cut off (trimmed) to get more desirable shape in the form of forgings.

Milling: Milling is a material removal process, which can create a variety of features on a part by cutting away the unwanted material by machining. Through milling, different features such as serrations, Ratchets, Male & Female box cuttings, different types of grooves etc. are produced in surgical instruments.

Grinding / Filing: These are material removing processes using different types of grinding wheels and files. This is a very critical stage in the instruments manufacturing because here the base for the general shape is produced using different types of gauges and the initial settings are done.

Heat Treatment: Heat treatment is done to change the instruments physical and mechanical properties without changing the original shape and size like “Annealing” is done to soften the material and “Hardening” is done to Produce Hardness and “Tempering” is done to produce toughness in the instruments. Thus heat treating is a very useful process to help other manufacturing processes and also improve product performance by increasing strength or provides other desirable characteristics

Chemical Treatment: The main purpose of chemical treatment is to clean the surface of the steel parts and if carried out properly, they all increase the corrosion resistance.The main processes used in the surgical instruments manufacturing includes:
  • Pickling

It is usually done after the heat treatment process to remove the scale formed because of oxidation. Dilute Sulfuric Acid / Nitric Acid is used for this purpose.

  • Passivation

The passivation is performed when free iron, oxide scale, rust, iron particles, metal chips adversely affect the stability of the surface.
Passivation consists of immersing stainless steel instruments in a solution of nitric or citric acid and sodium dichromate, dissolving the imbedded iron particles and restoring the original corrosion-resistant surface by forming a thin, transparent oxide film.

  • Electro polishing

Passivation also is accomplished by electro polishing. Electro polishing is an electrochemical process that is a super passivator of stainless steel and results in a more passive surface than the other methods mentioned above.

The metal, which is electro polished gives a bright surface and appearance of metal looks fine. The second advantage is that some burr is also removed in this process. Most commonly phosphoric and sulphuric acids are used in conjunction with a high current density to clean and smooth (by metal removal) the surface of the steel.

Fixing: At this stage setting is done to align the instruments with proper functioning.

Polishing /Buffing : These are the metal finishing processes to produce different types of appearances like mirror or dull. Different abrasives are used on a work wheel to finalize the finish.

Checking/ Packing:  The instruments are checked for desired specifications and sent for final inspection and testing before packing.

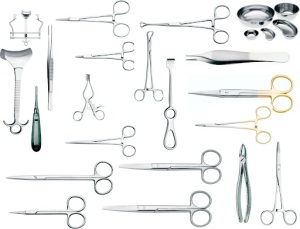
What are surgical instruments…?

What are Surgical Instruments..?

So what are these….? Simply “These are the tools used by a Surgeon during operation, examination etc.”
For every part of a human body there are specially designed instruments which are used such as ophthalmic instruments used in Eye surgery, cardiovascular instruments use in heart surgery, Skin instruments, Kidney instruments etc.
Surgical Instruments are also categorized as single use and reusable.
Those instruments which are marked as single use  (encircled 2 with a crossing line) are usually sterilized packed and can only be used once where as reusable instruments can be used again and again after sterilization, provided their maintenance is carried out as per standard procedure.

History

Archeologist found different objects such as bones , bamboo , stones in the crude instruments form from the period around 10,000 B.C  which were used for medical purposes at that time.
More sophisticated tools were found in the late Bronze and Iron ages and the early Egyptian civilization. These tools were far more superior function wise as compared to the stone ages tools and showed us a continued improvement in the designs fulfilling the human needs.
In the middle Ages and the Renaissance surgical instrument development continued in Europe and a whole range of instruments used exclusively for surgery emerged.
Surgical Instruments can be broadly categorized as follows:
  •      Cutting Instruments: those with a cutting edge such as saws, knives,    some of these requiring Grips / handles.
  •       Gripping instruments such as  , Thumb Dressings , Tweezers, Spatulas

·                Paired items like Forceps, Scissors , Rongeurs .
Production simply starts with Forging, then machining followed by some filing , Grinding  and Polishing .
From the 17th century to the 19th century, new studies and research in the surgery field led to the development of more sophisticated tools with specialized functions to be used on different parts of human bodies.
In the 20th century people started using stainless steel for manufacturing surgical instruments because of its properties such as corrosion resistance, hardness, formability, long life and till present stainless steel is considered to be the most suitable material for majority of the instruments etc.

Recent development includes the use of other material like titanium ,Silver alloys, Laser guided instruments and micro surgery instruments.